
La Pavoni: Replacing Boiler Gaskets
Posted: August 10, 2020 Filed under: espresso, maintenance, Uncategorized | Tags: boiler, espresso, espresso machine, europiccola, gasket, la pavoni, lever, lever machine, maintenance, pavoni, professional, replacement, stradivari, stradivarius 11 CommentsI got addicted to cappuccino when I worked in coffee houses and bought my first espresso machine, a Jura Rio D’Oro with built-in grinder, when I was still living in student quarters at Uilenstede. Later I bought a secondhand Quickmill 820 and a separate grinder, and finally my La Pavoni Professional.

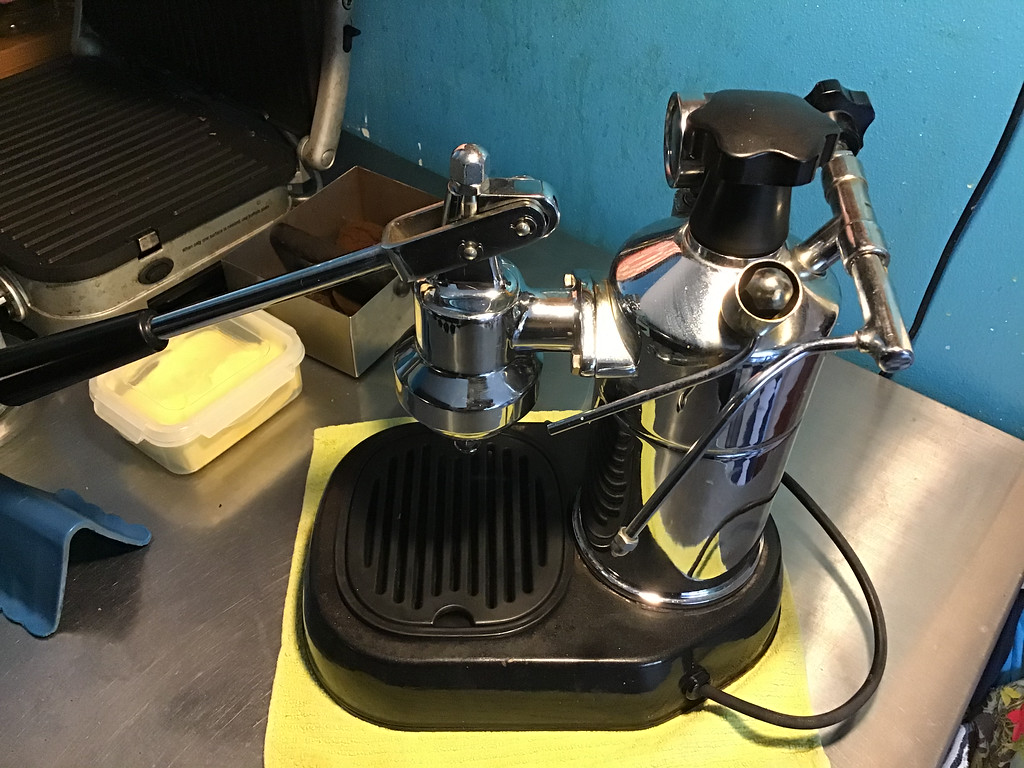
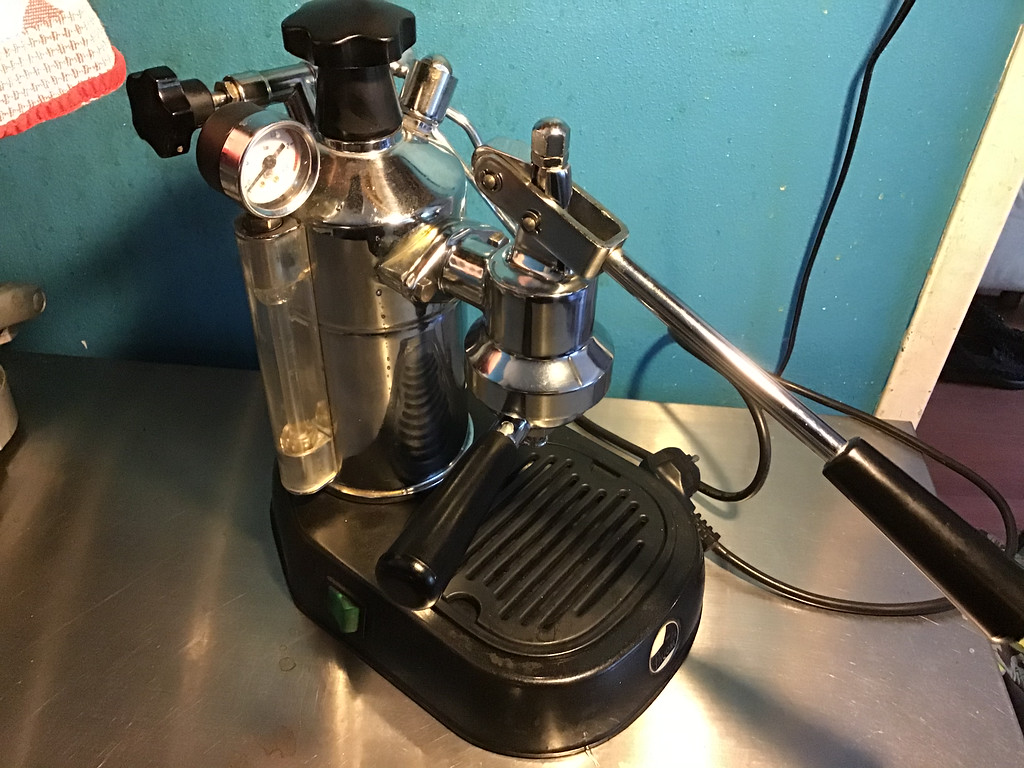
These lovely machines have been made since the early sixties and are popular machines, mainly due to their simplicity. The only electric part is the heating element in the boiler, everything else is mechanical.
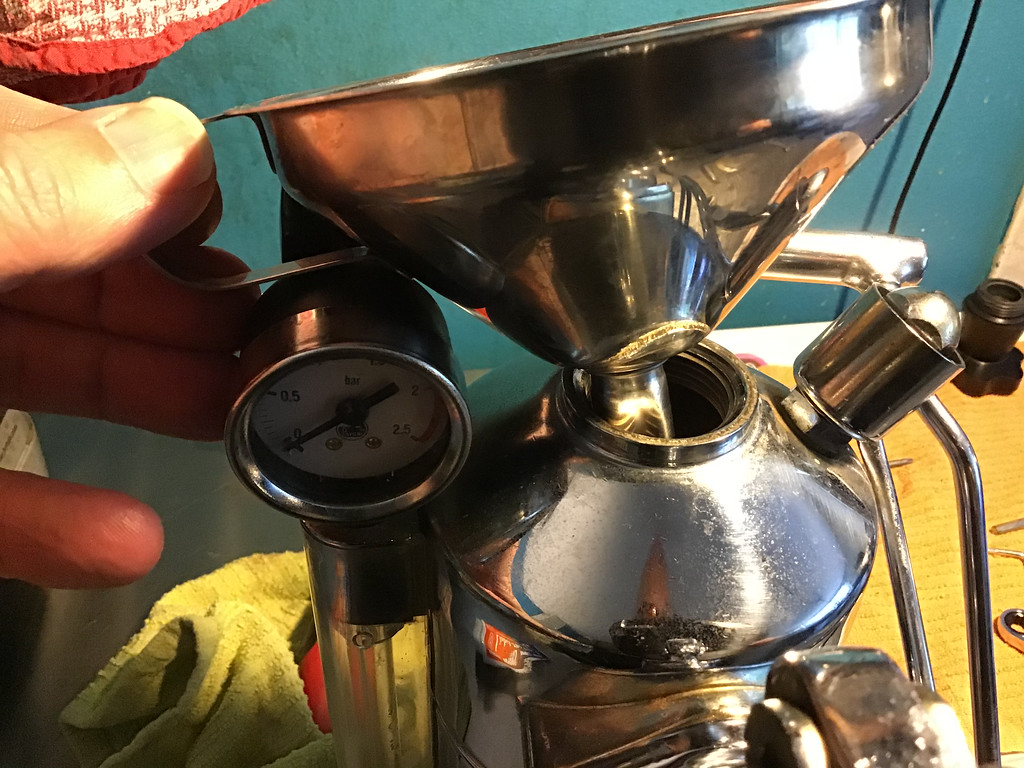
Without going into the whole history of La Pavoni Europiccola / Professional machines, there are basically two versions of the machine: the Europiccola, which is the version with an 0.8 liter boiler; and the Professional with a 1.6 liter boiler and a pressure gauge.
There are also luxury versions, like the Stradivari, but all these lever machines basically work the same way. You fill the boiler with water, wait until the machine is heated up (15 minutes), put coffee in the portafilter that you screw under the group, place a cup on the drip tray, lift the lever to mechanically use the vacuum in the group to fill the group with hot water, wait until the first drips fall into the cup signalling that the puck of coffee has been pre-infused with water, and pull down the lever to push the water in the group through the coffee into the cup.
Pre-Millenium and Millenium machines.
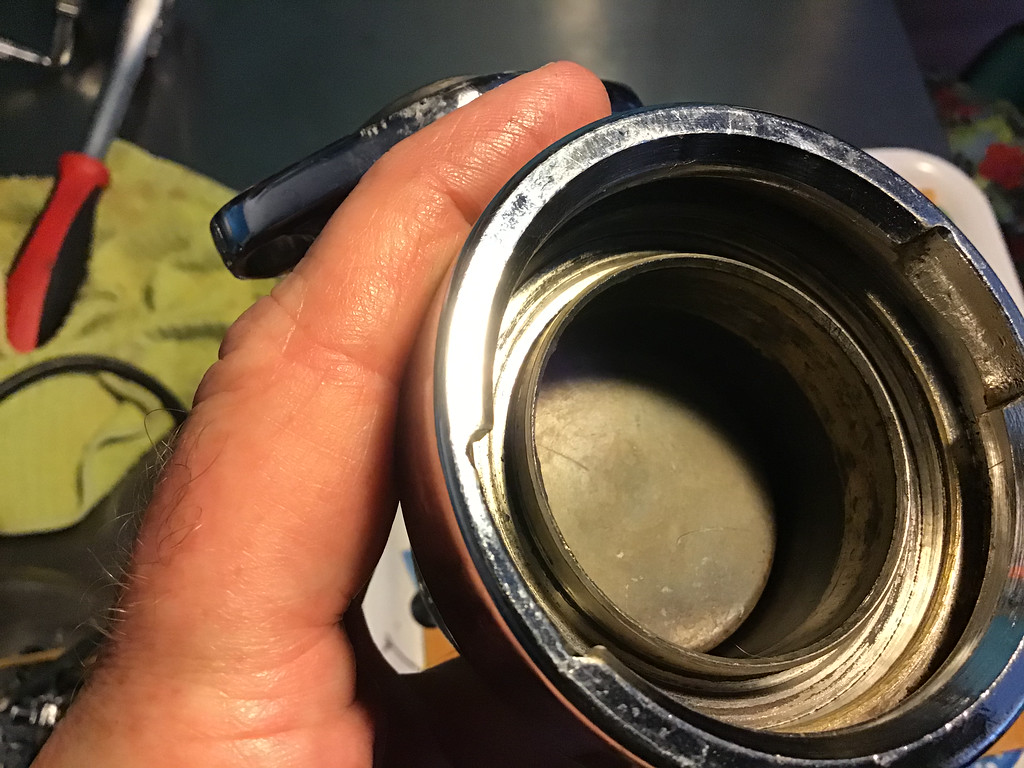
After 1998, La Pavoni made a change in the group of the lever machines, enlarging the group from 48mm to 51mm and installing a teflon sleeve in the new larger group. The newer models were called Millenium and the older types with the smaller groups were called Pre-Millenium.
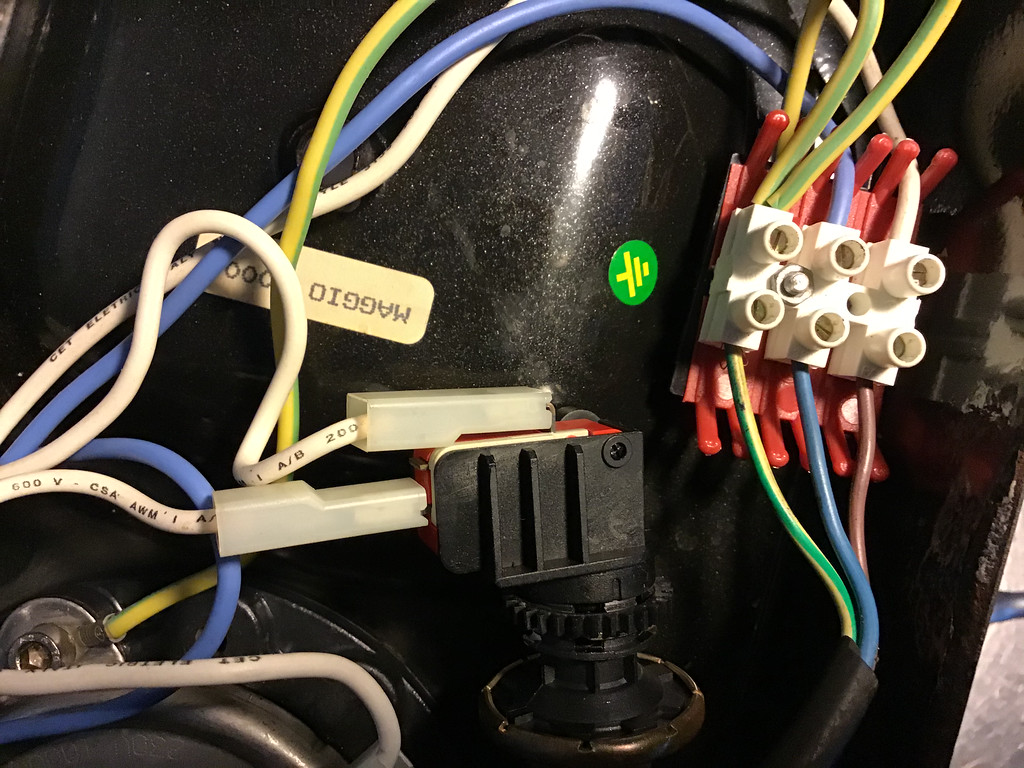
If you open up the bottom of your Pavoni, you will see a sticker under the drip tray with the manufacturing date. Mine says 2000, but has the small group, which initially confused me since I thought that every machine made after 1998 had the larger group. However, I found out that in-between the two models, between 1997 and 2001, they made a Pre-Millenium model with the small group and a teflon piston.
I bought my Professional secondhand and found out that the previous owner had replaced the teflon piston with the brass piston of the older models. So, the most important part of determining whether you have the Pre-Millenium is the size of the group, not the date on the bottom plate.
Since my Professional is a 2000 machine, the heating element is steel, not brass, and has a fuse to prevent the element from overheating, as on most Millenium models. Before you attempt to change boiler gaskets, you have to find out what gaskets you need, depending on the age of your machine, and whether the heating element is the older brass version or the newer steel version, which have different gaskets.
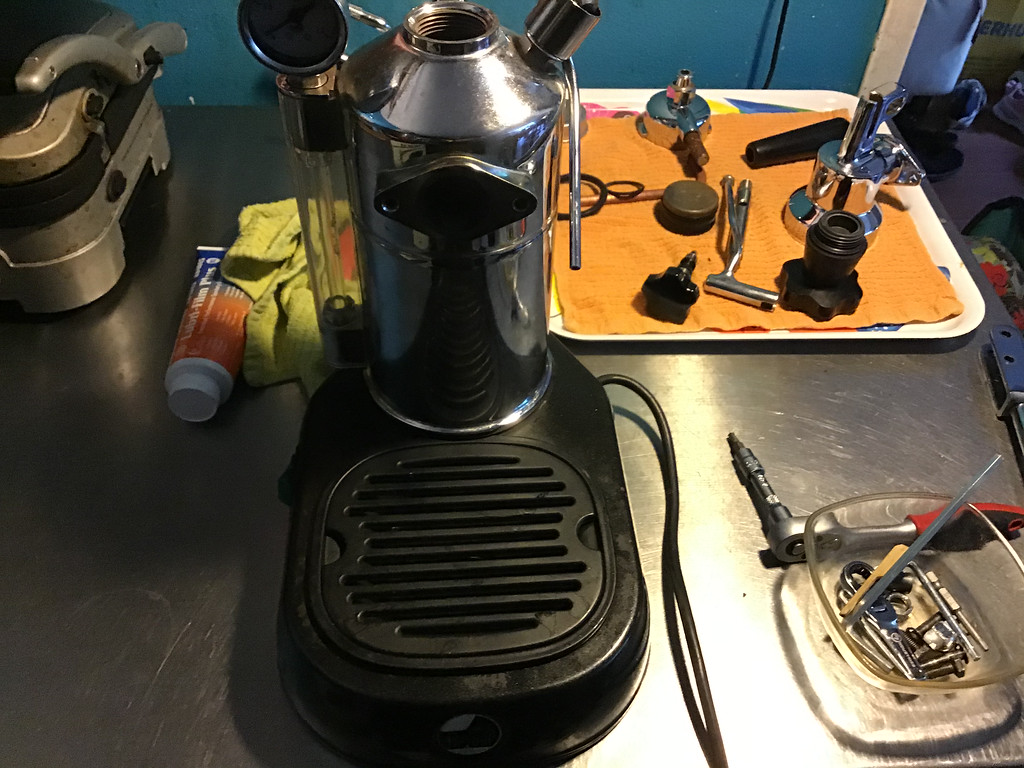
I send pictures of the underside of my machine to a Pavoni parts store where they pointed out which gaskets I needed and where to place them.
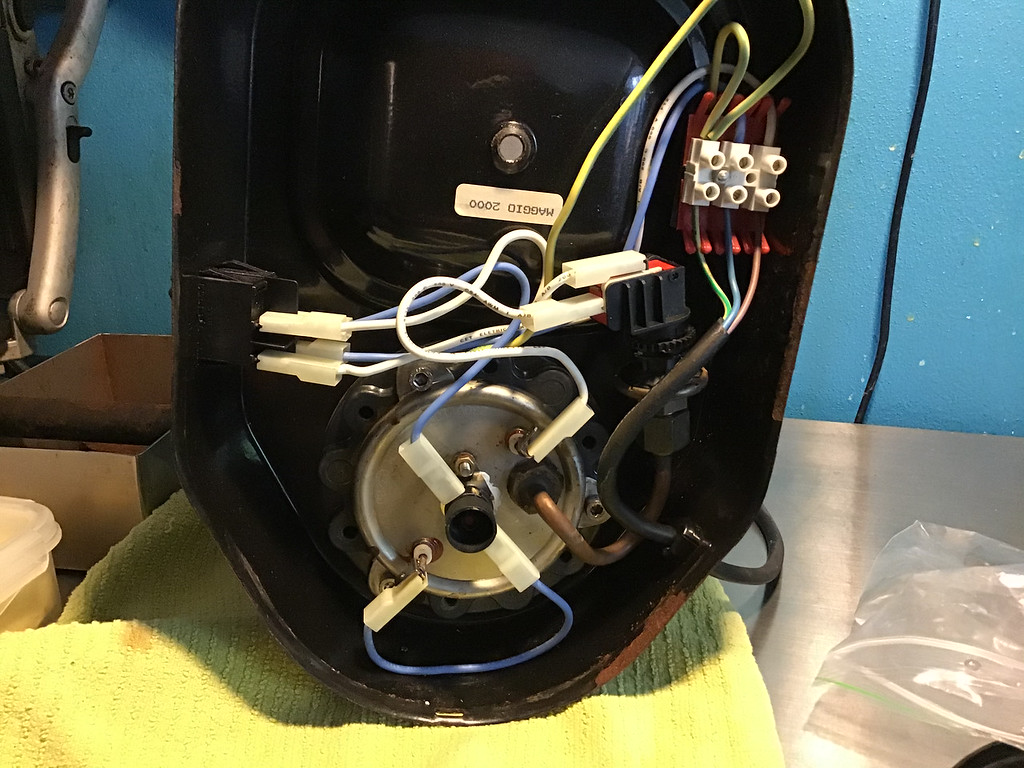
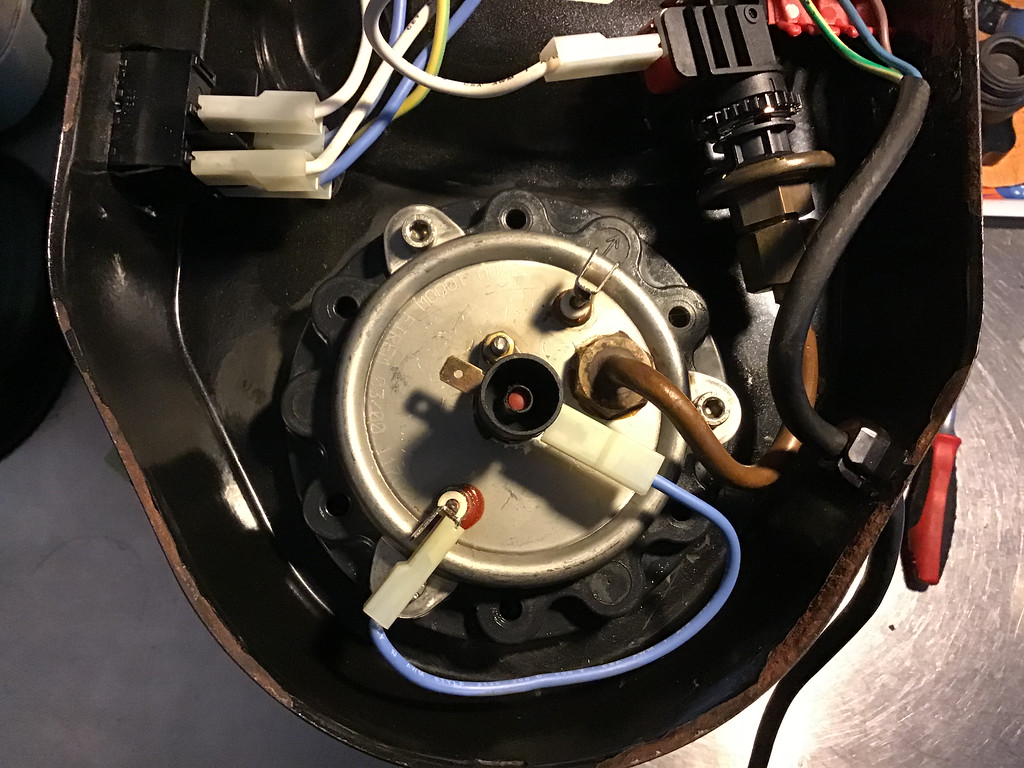
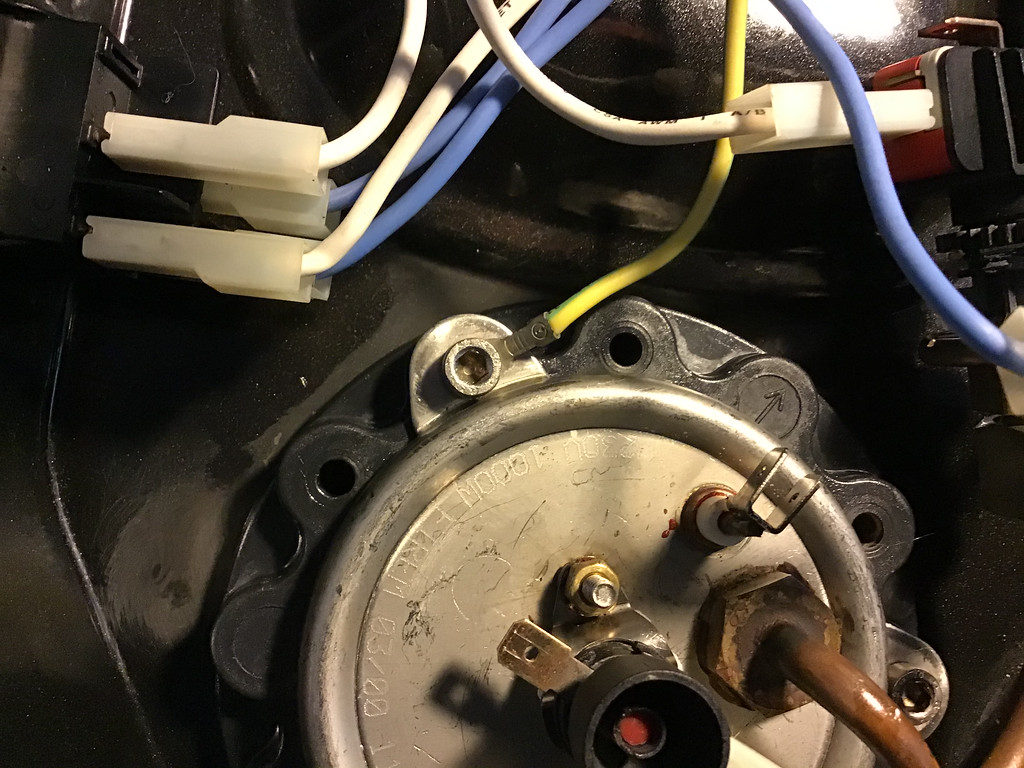
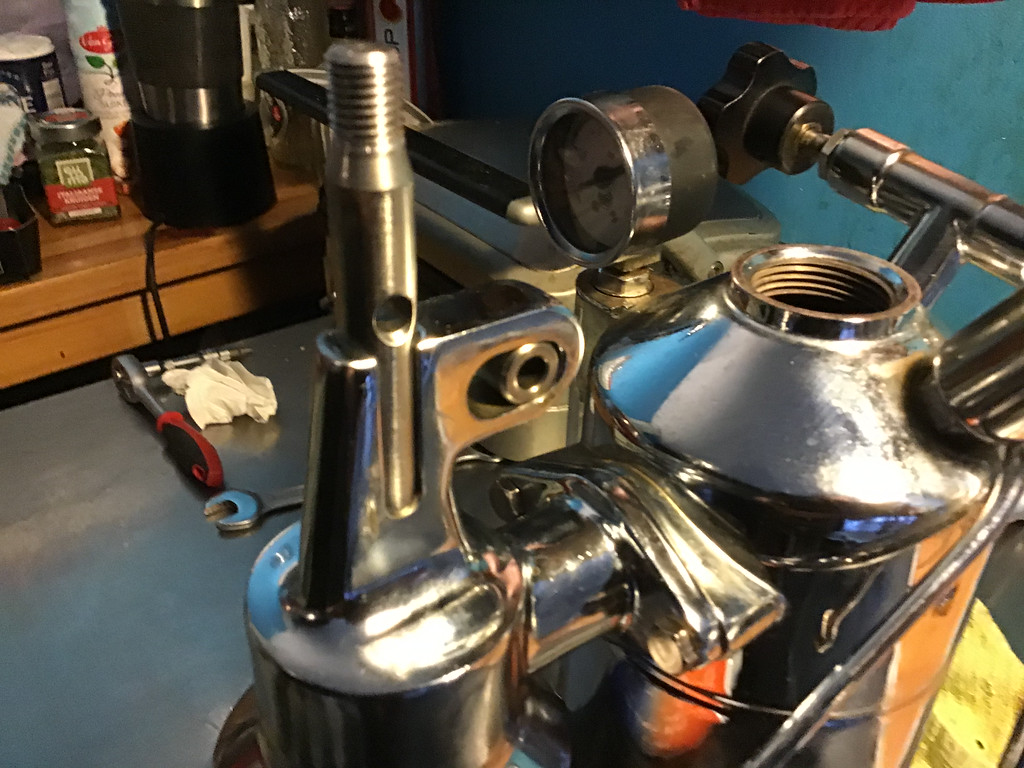
Before you do anything, make sure to take detailed pictures of the schematics, so you can assemble the machine correctly!
Disassembly of the machine is a pain in the ass, mostly because of the flange holding the boiler. There is a factory tool to remove the flange, but that costs 100+ euro, which was way over my budget. So I bought a 5 euro oil filter removal tool that did the trick. I don’t have pictures of removing the flange, but this is how you do it:
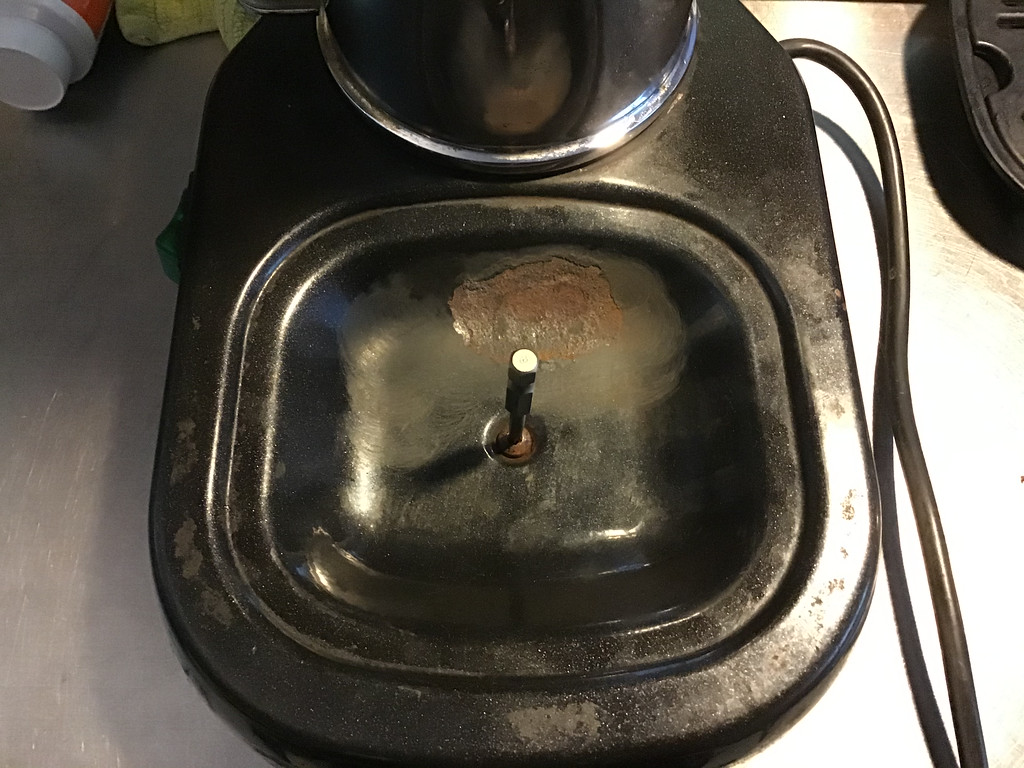
Pull the plug on the machine, unscrew the bottom plate (in my case a secure torx screw under the drip tray) and remove the bottom plate.

After taking picturs of the electric circuit, you pull the wiring clips from the element, unscrew the bolts and gently remove the element from the underside of the boiler. Important to note that one of the bolts held down the ground wire, which is why the schematics photo is so important!
After removing the heating element, you have to use penetrating oil (I used Lubra Rapid lock oil) in and around the flange and let it sit overnight. The flange has holes all around that you can squirt oil in to reach the old dried-out gasket underneath.
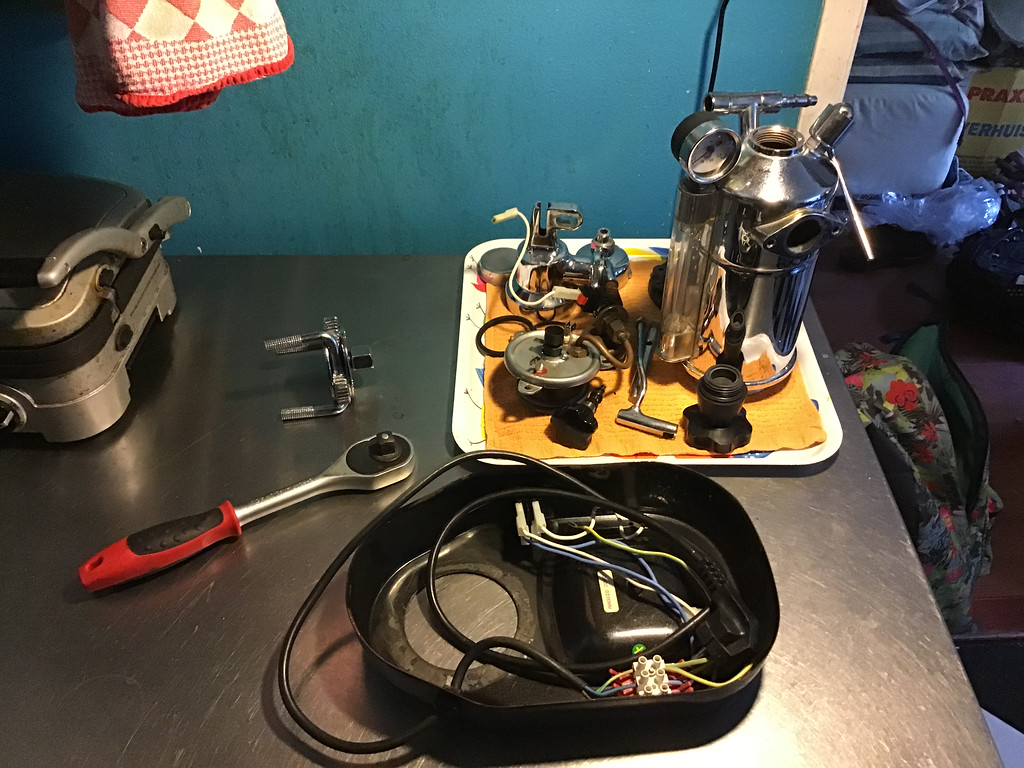
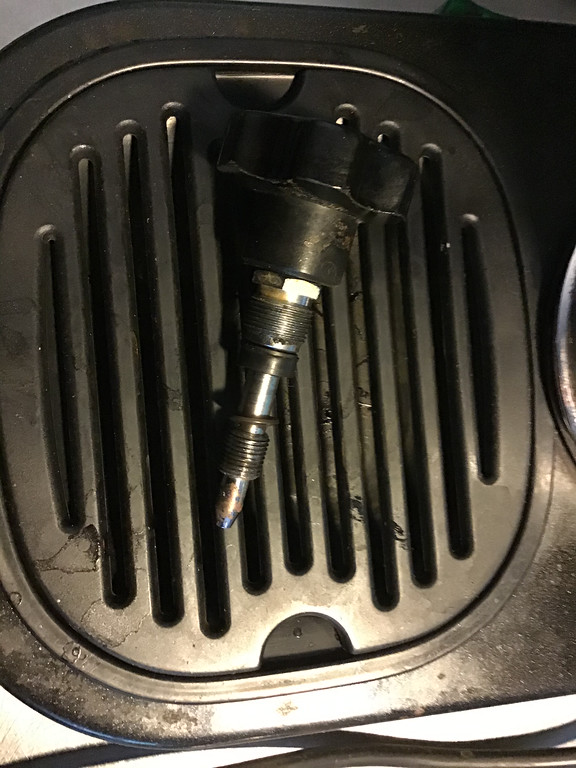
I used the waiting time to put the heating element in a bowl of descaling liquid, making sure only the element itself hung in there (the part that is usually submerged in the boiler), not the part with the wiring.
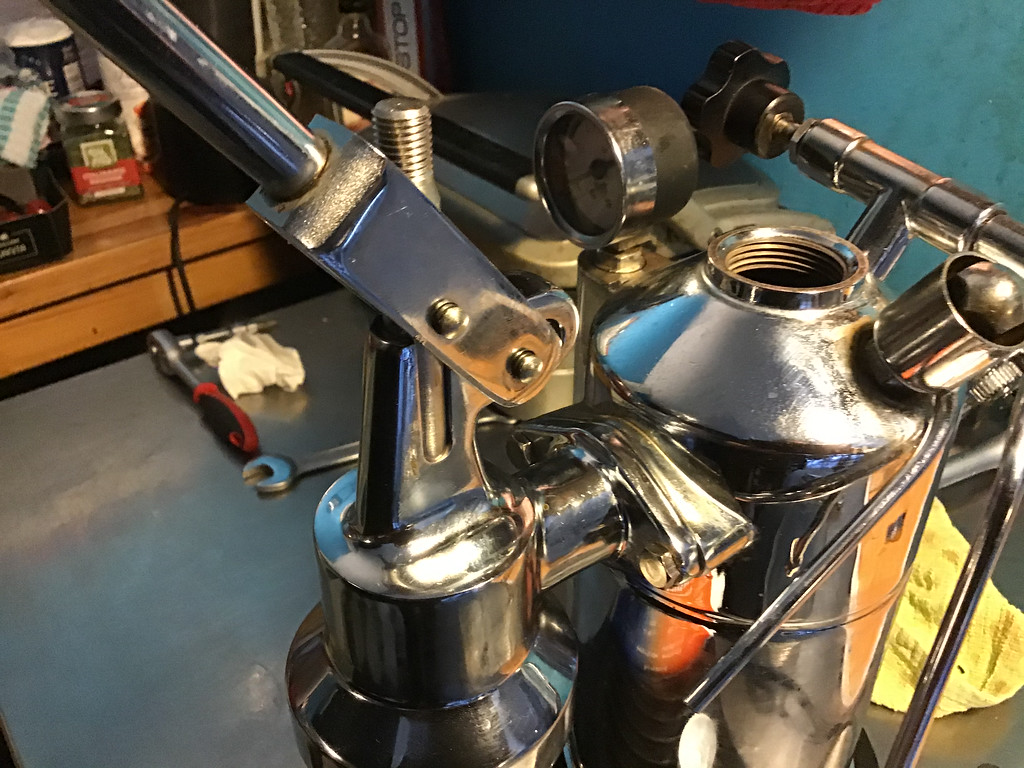
The next day, you take a hair dryer and heat up the flange and the boiler. Heat and oil should soften the gasket and help unscrew the flange. With the oil filter key in the slots, I used the long handled wrench to put pressure to unscrew the flange counter-clockwise. My first attempt didn’t work, so I oiled the flange and gasket again and let it soak for another few hours, then heated it up with the hair dryer again and tried again to unscrew the flange. Using a rubber mallet I tapped the flange around the rim, put the oil filter key again and wiggled the handle of the wrench to jog the flange. Still no movement. Don’t despair, removing the flange is the hardest thing about changing the gaskets and it requires patience.
If you’re the impatient type, don’t even try to change these gaskets (now you tell me?).
On my third attempt, after heating the flange and pulling the handle of the wrench towards me while I used my other hand to steady the base and keep the oil filter key in position, the flange started to move.
YES!
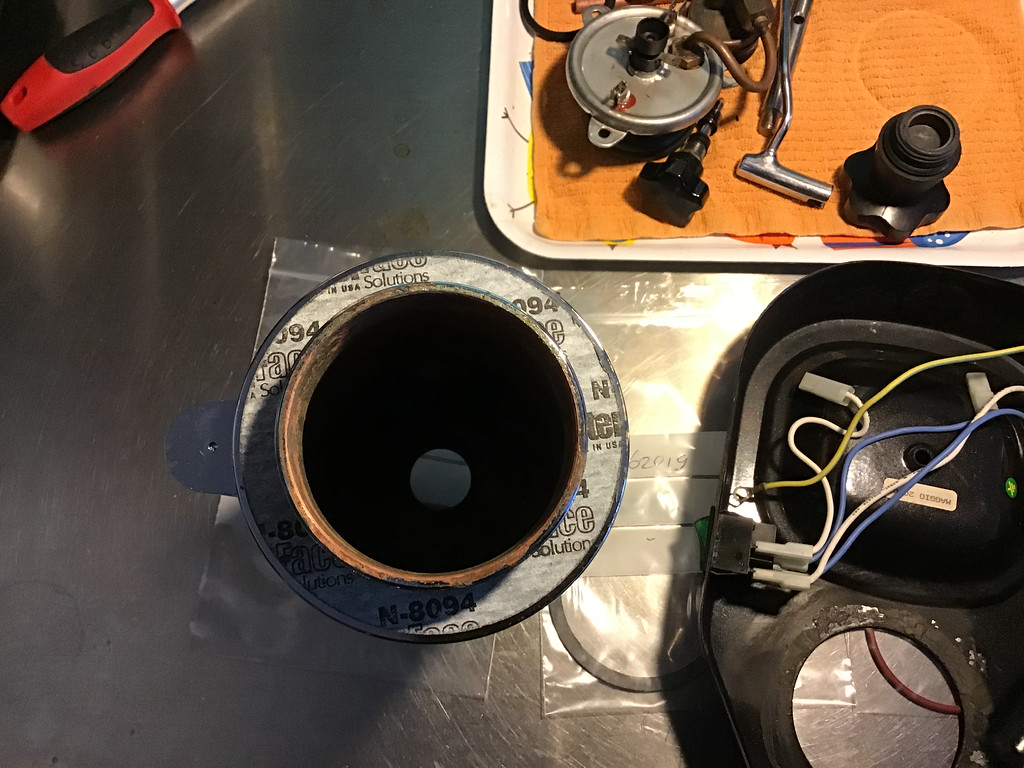
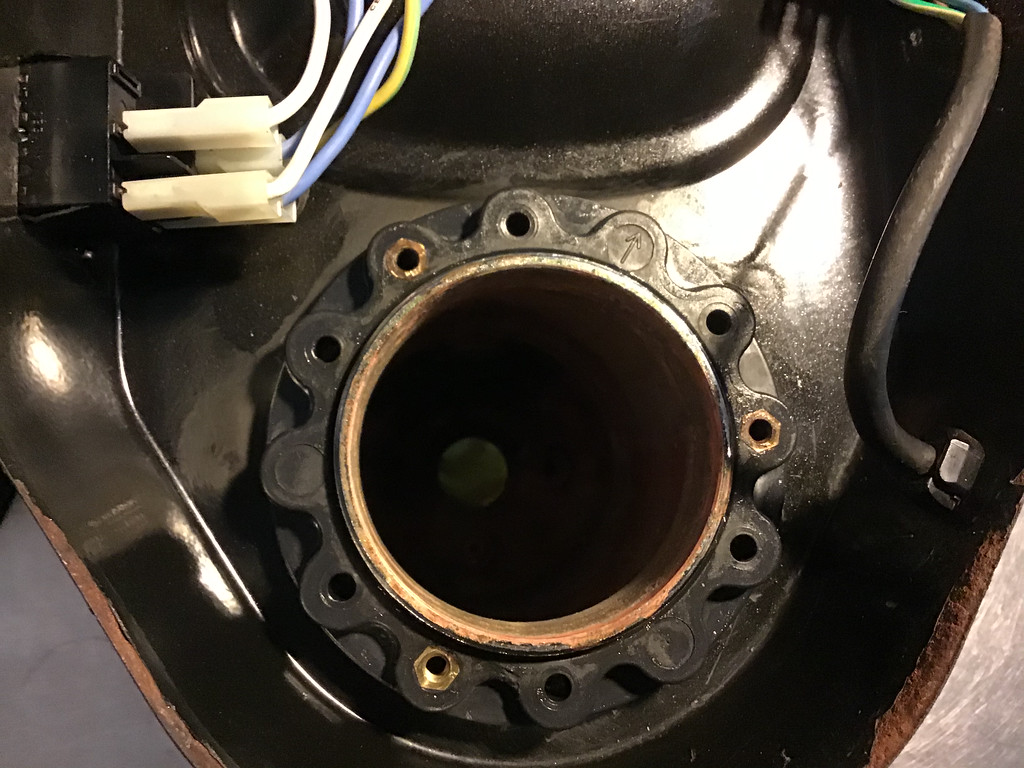
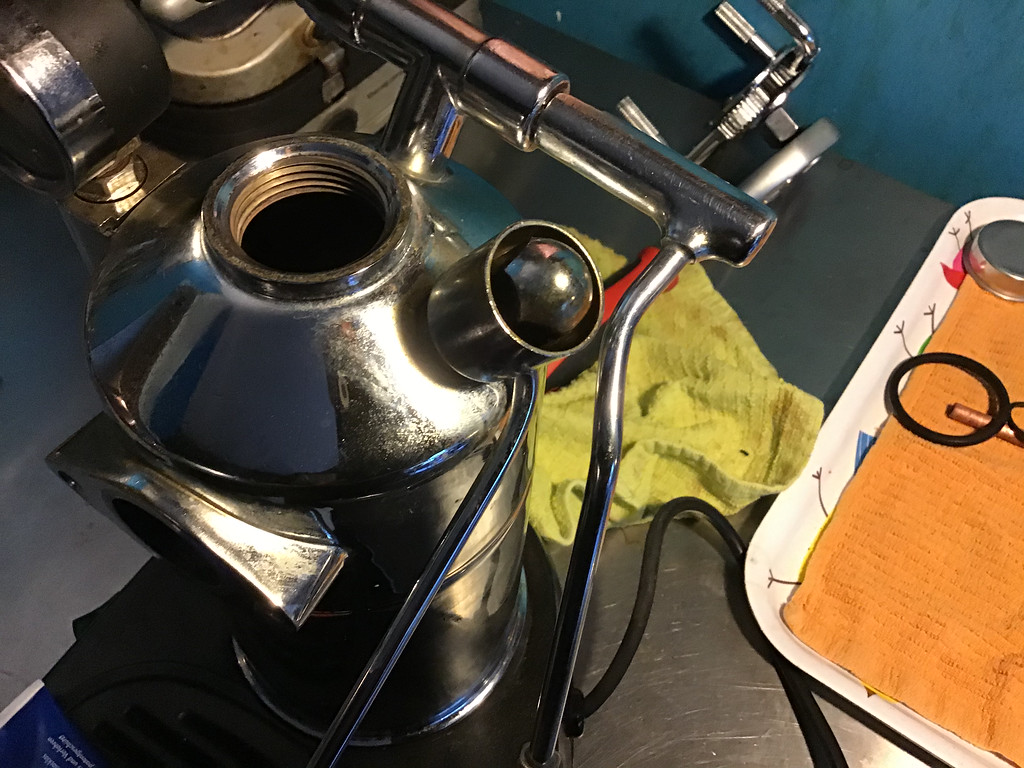
I made sure the threads of the boiler were oiled, so I could unscrew the flange and remove the boiler from the base.
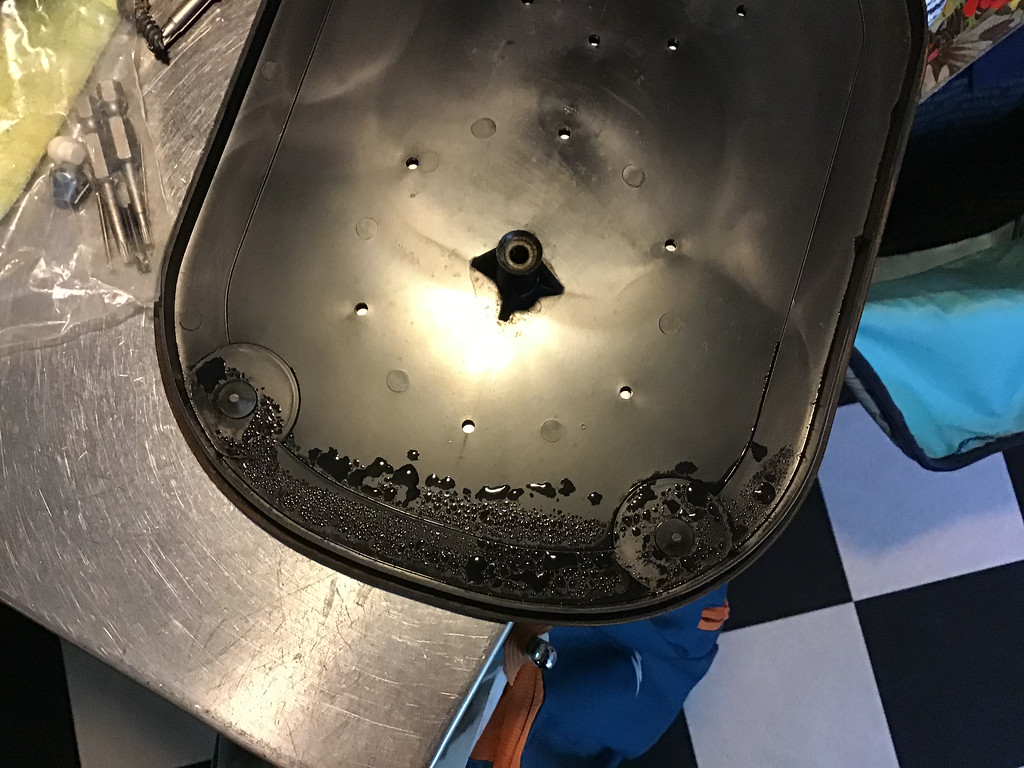
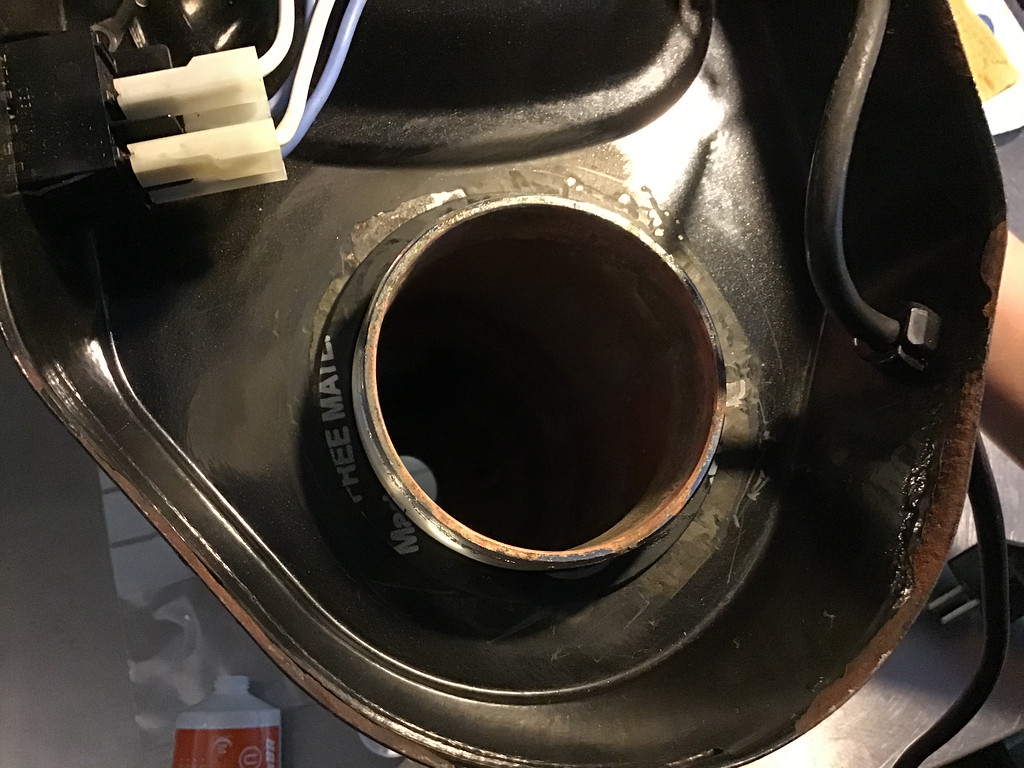
Since this was probably the first time the gaskets were going to be replaced (yes, I only started when the boiler started leaking moisture), the hot boiler had hardened the old gaskets. The upper gasket between the boiler and the base broke into hard pieces, but the lower one between the base and the flange had fused with the base. I had to heat that gasket with the hair dryer, chip away at it with a dull knife and a drill with a polishing brush to remove that gasket.
I also screwed a plastic lid from a choco pasta jar under the boiler and filled it with descaling liquid, which I had to do three times before all the scale was gone. Like i said, this is a job for patient people who don’t mind leaving stuff soaking overnight.
After cleaning all the parts, the assembly with new gaskets was much easier than the disassembly had been.
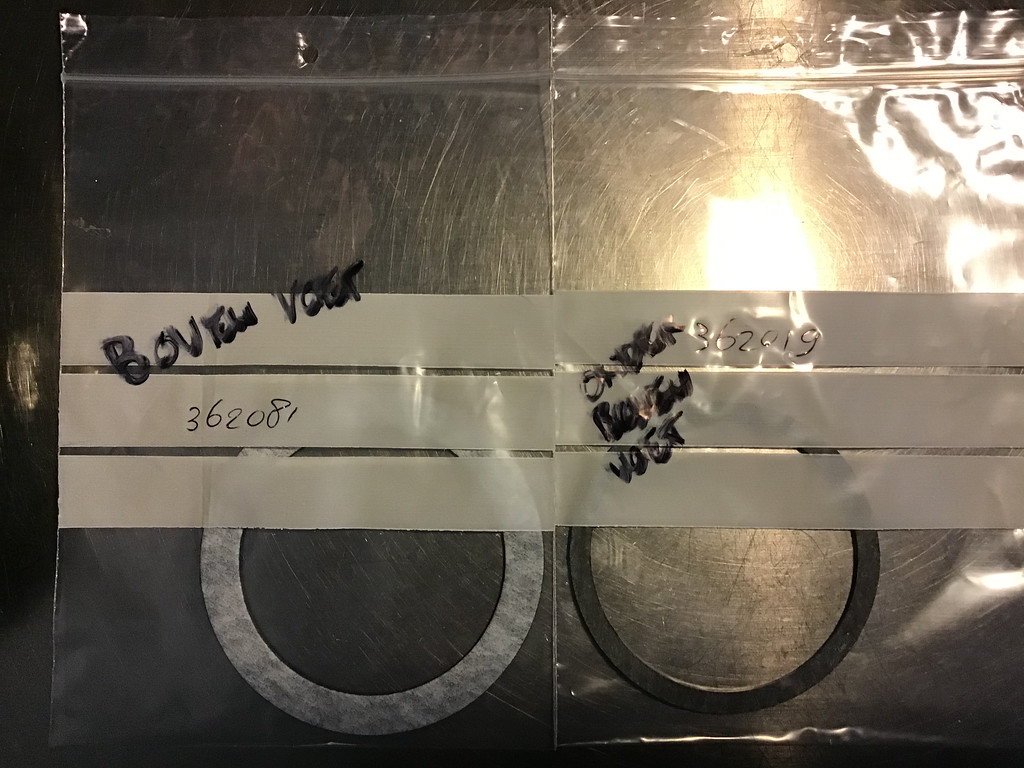
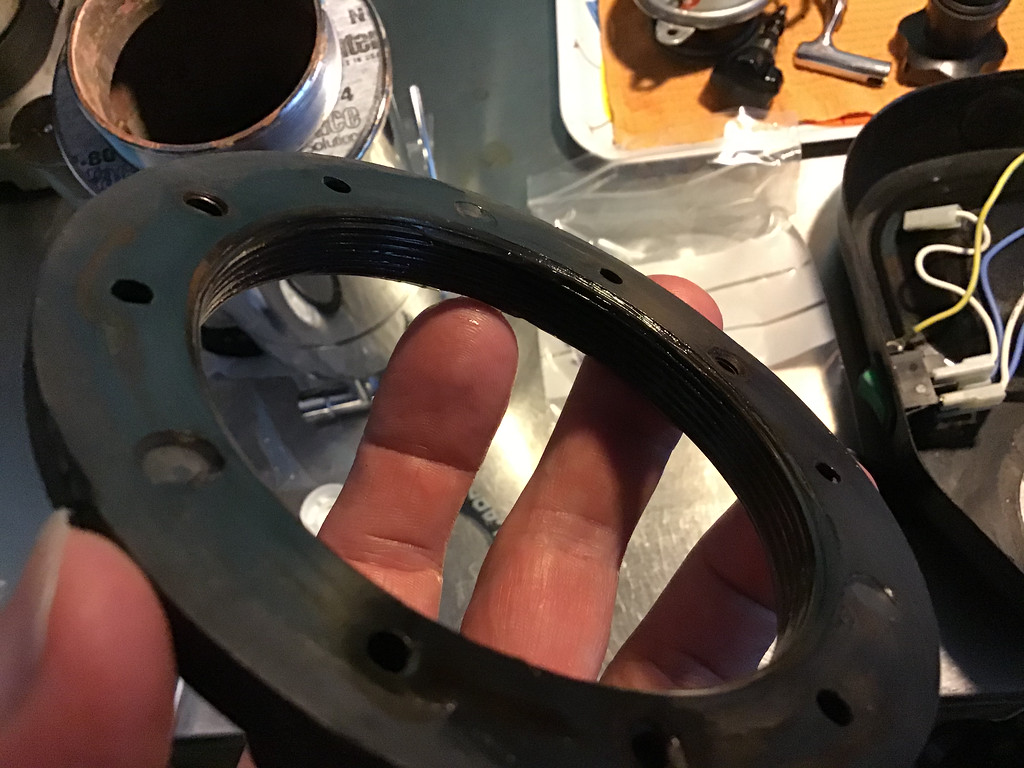
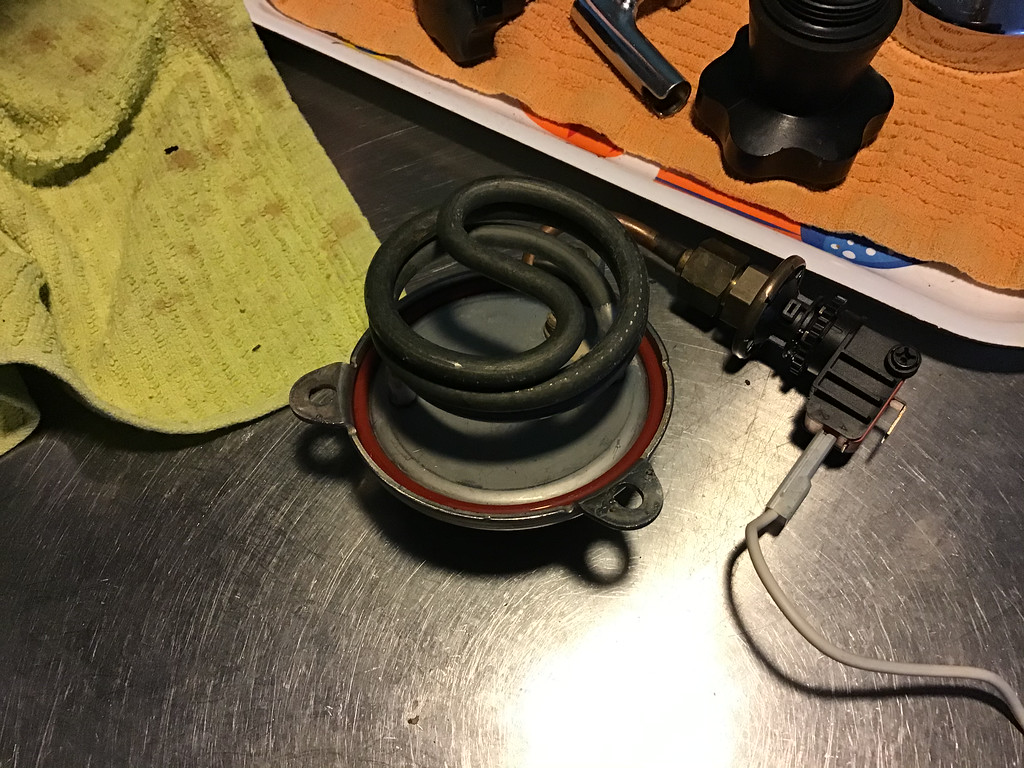
It’s important to know the order of the gaskets. The gasket on the left goes between the boiler and the base, I will call this the Boiler Gasket. The gasket on the right goes under the base between the boiler and the flange, I will call this the Flange Gasket.
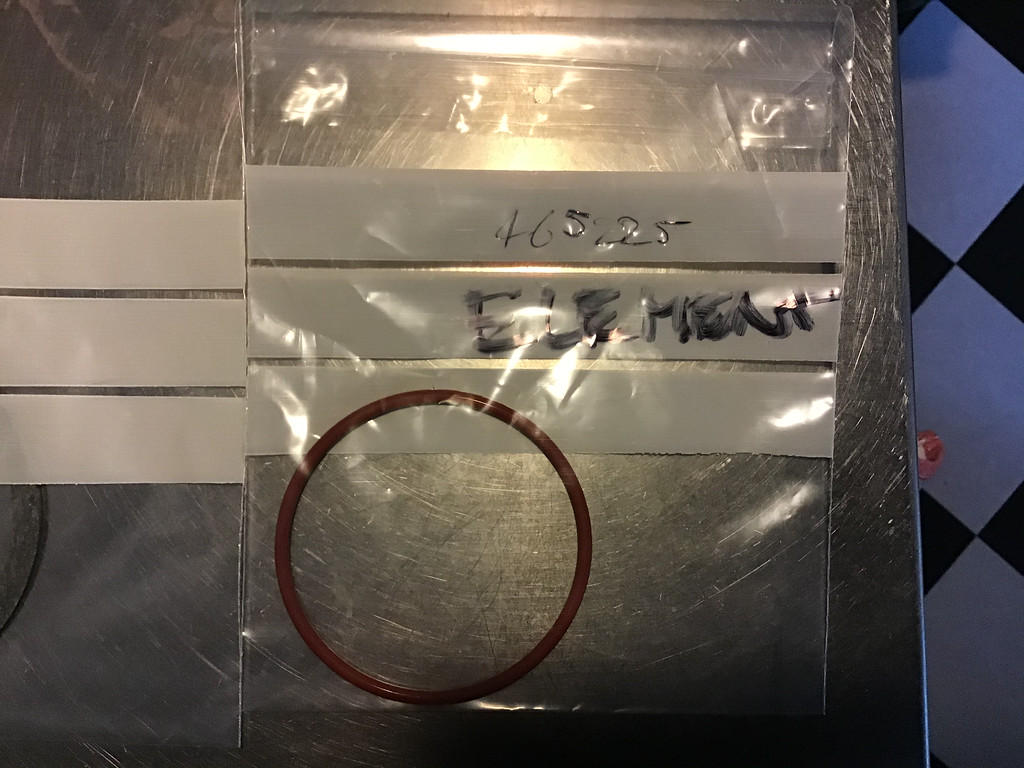
The third gasket is a thin one that fits in the rim of the heating element.
First, you install the Boiler Gasket, dry. This gasket is not oiled!
Next, you grease up the Flange Gasket, put the upside down base on the upended boiler and fit the Flange Gasket.
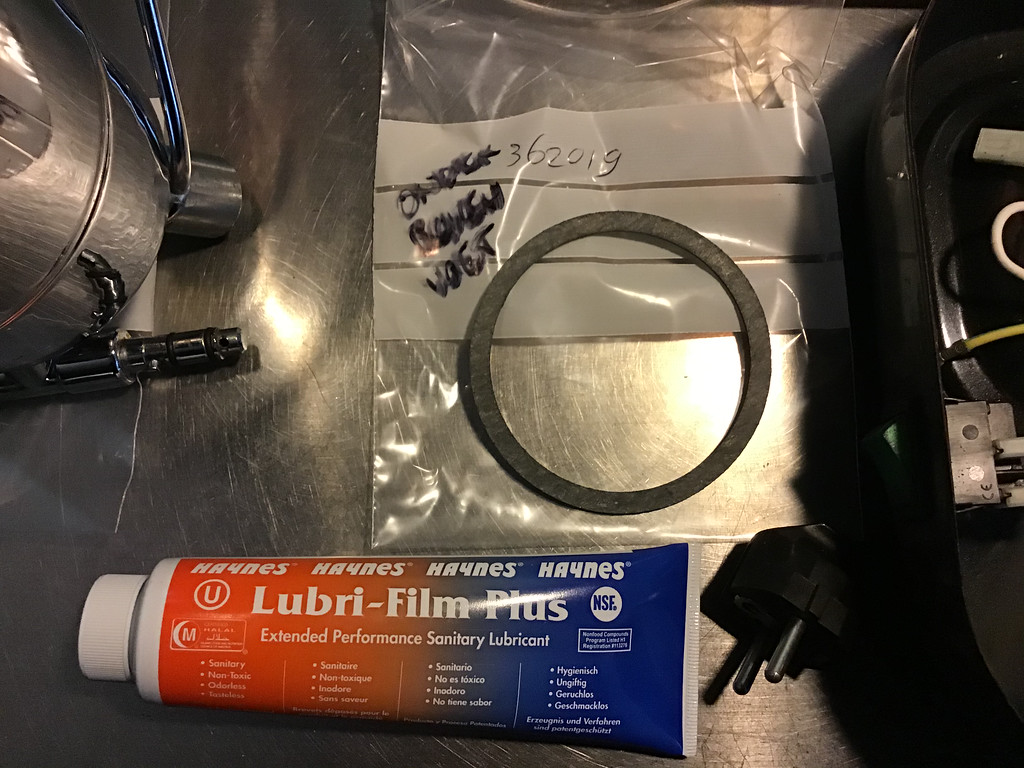
And grease the inner thread of the flange and the threads of the boiler to screw the flange onto the boiler threads by hand.
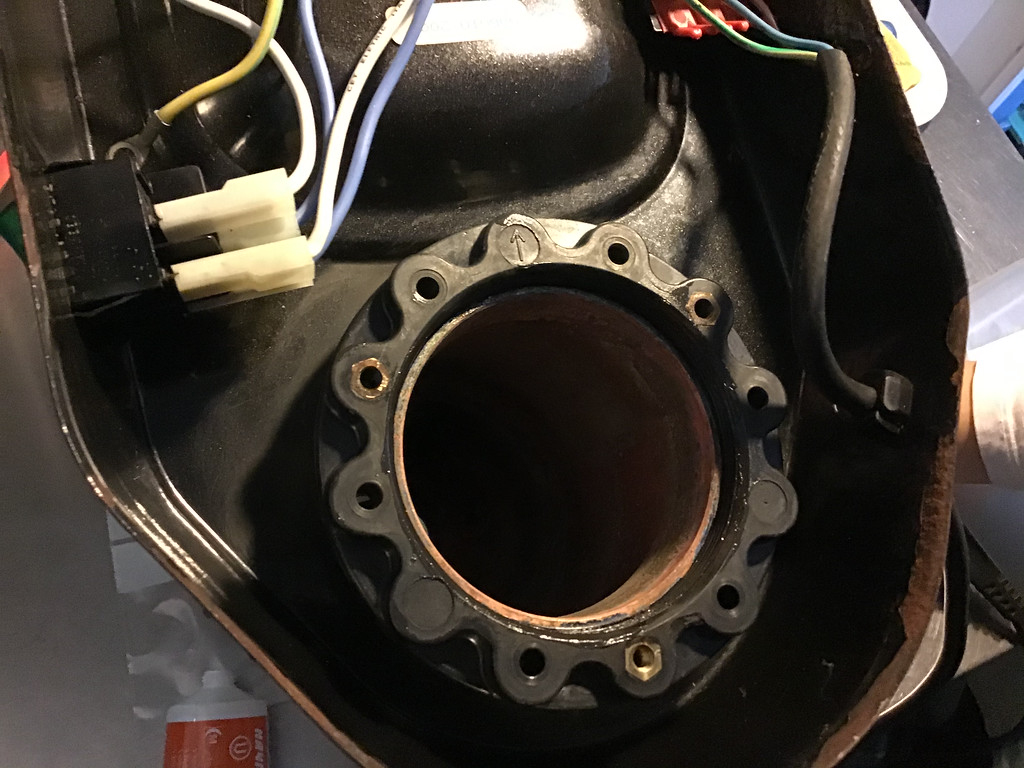
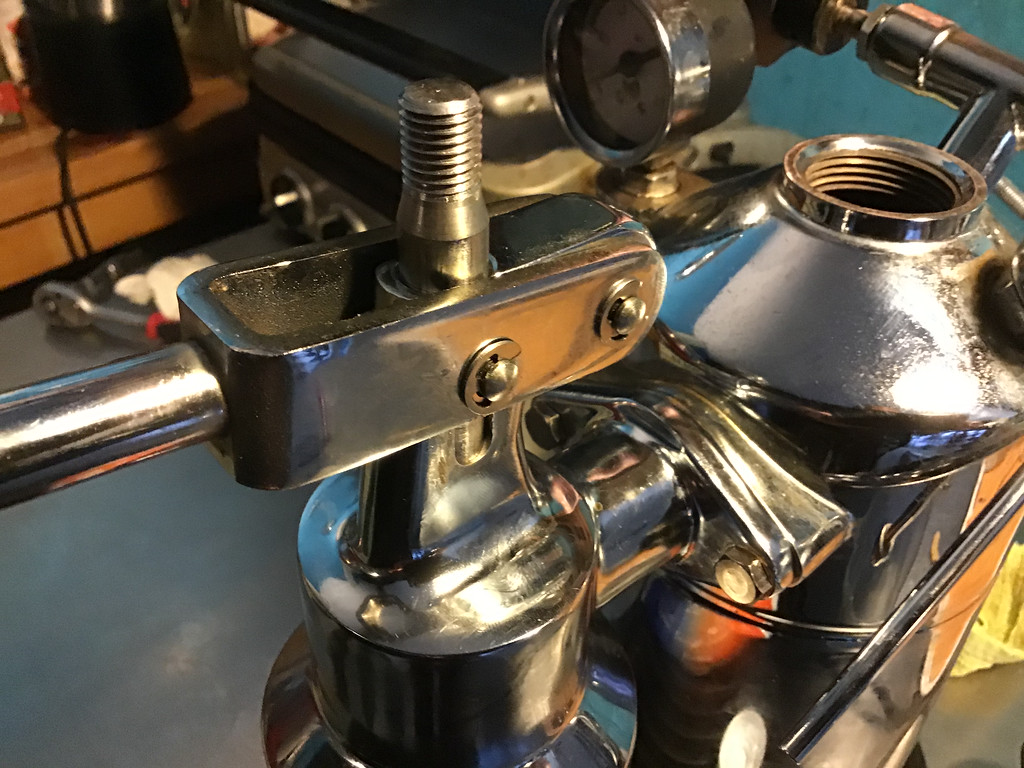
Hand-tighten the flange and check if the boiler and base are in the correct position, then put the Oil Filter Key on the flange and tighten the flange.
The flange has three holes with copper threads for the bolts of the heating element. They have to be in the correct position.
Lightly grease the element gasket before fitting it to the heating element, so it will stay in position when you put the element in place.
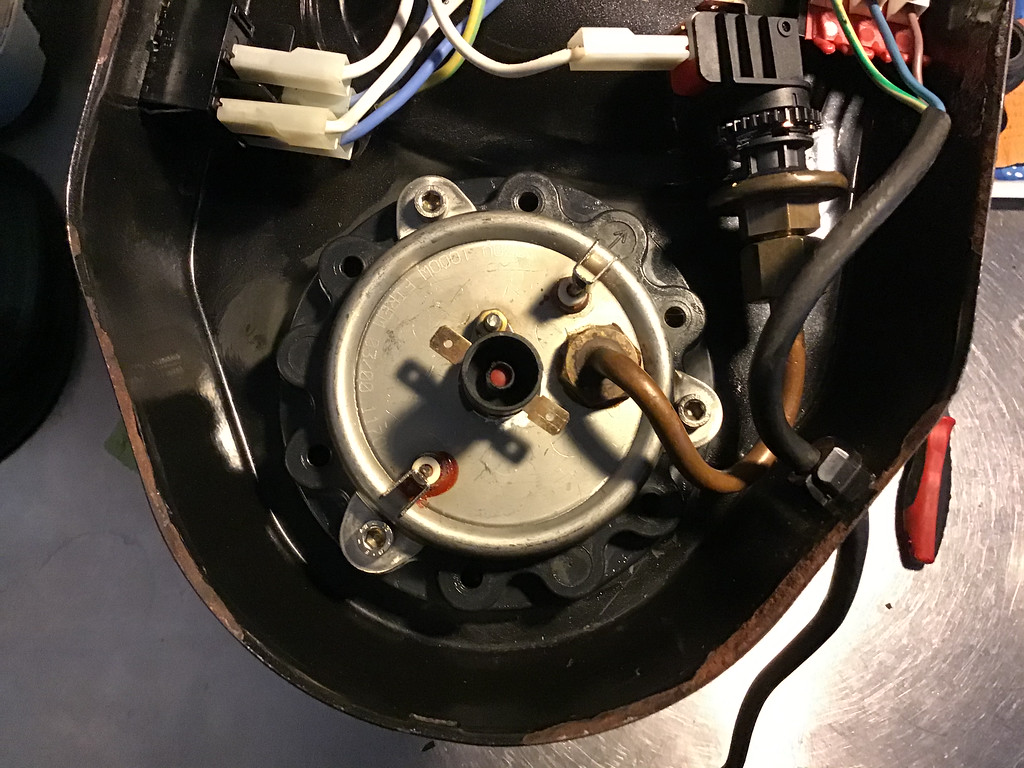
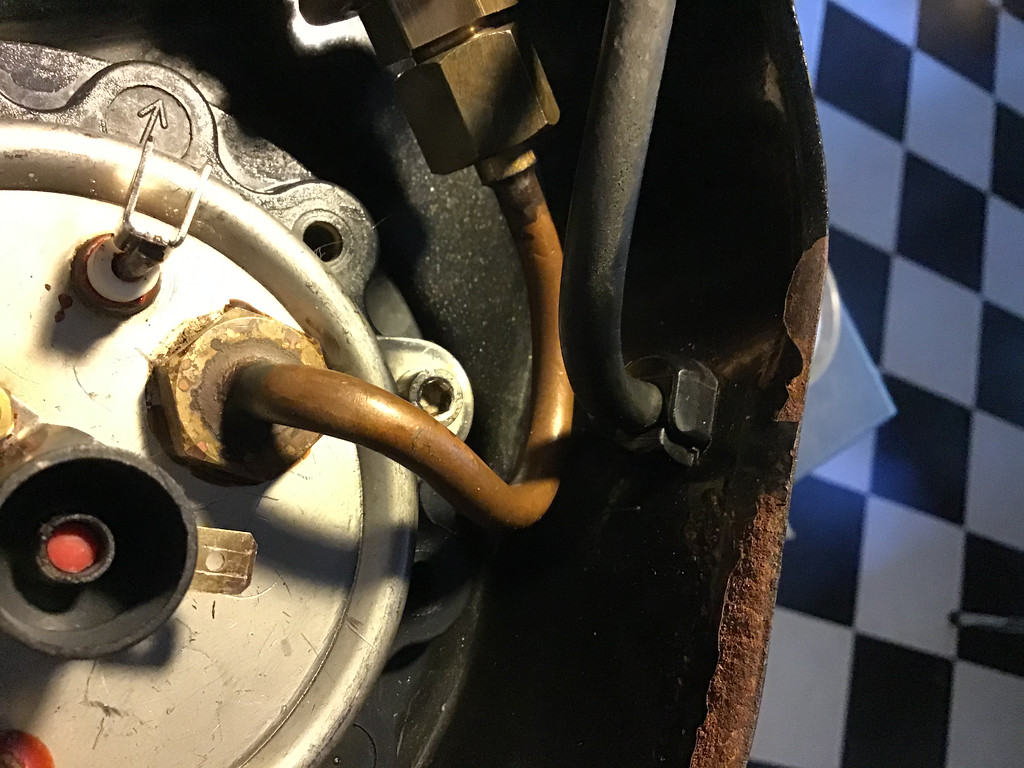
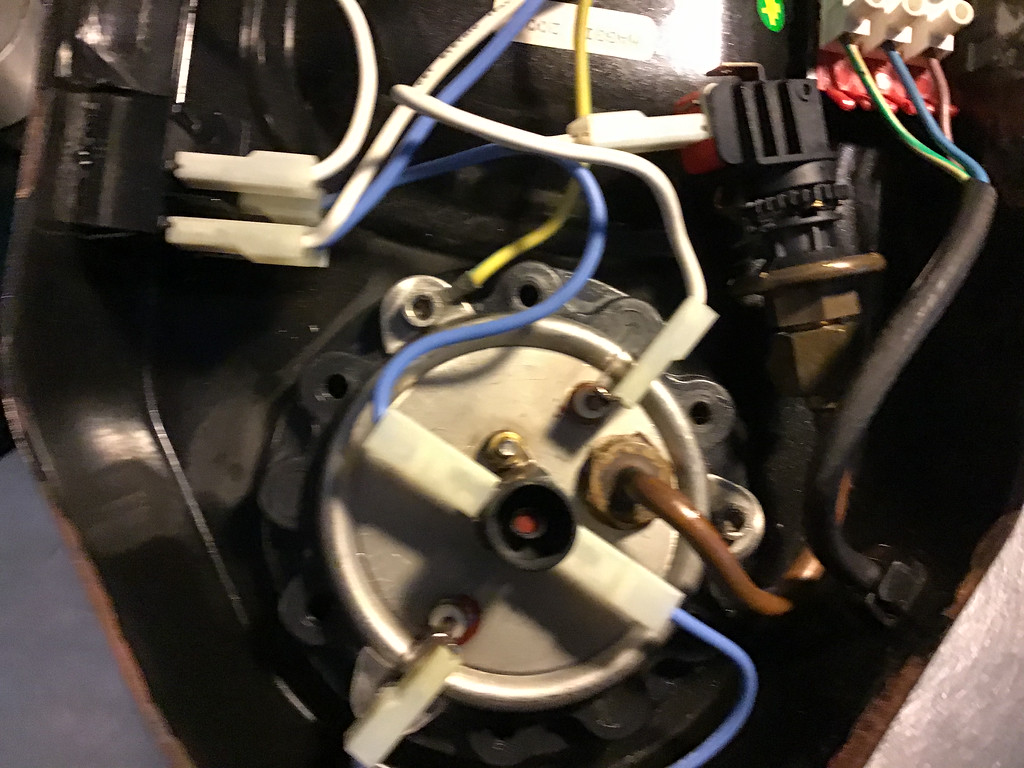
The bended copper tube of the heating element has to curve around the electric cable, or it will damage the cable when it heats up.
Now you plug the wiring back in. First the wiring around the fuse.
Then we unscrew the bolt near the drip tray, place the ground cable over the hole and reinsert the bolt and tighten it carefully, making sure the ground cable angles away slightly from the heating element.
And we use the schematics photo to put the wiring clips back on the heating element.
Now we can cover the underside with the ABS bottom plate again.
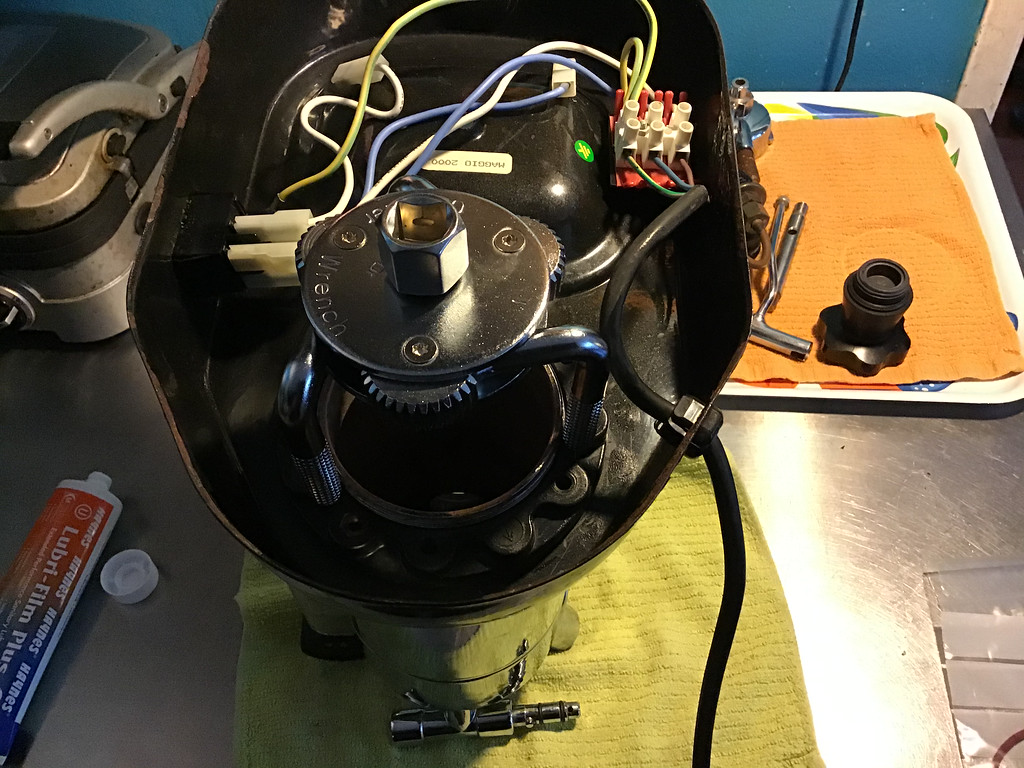
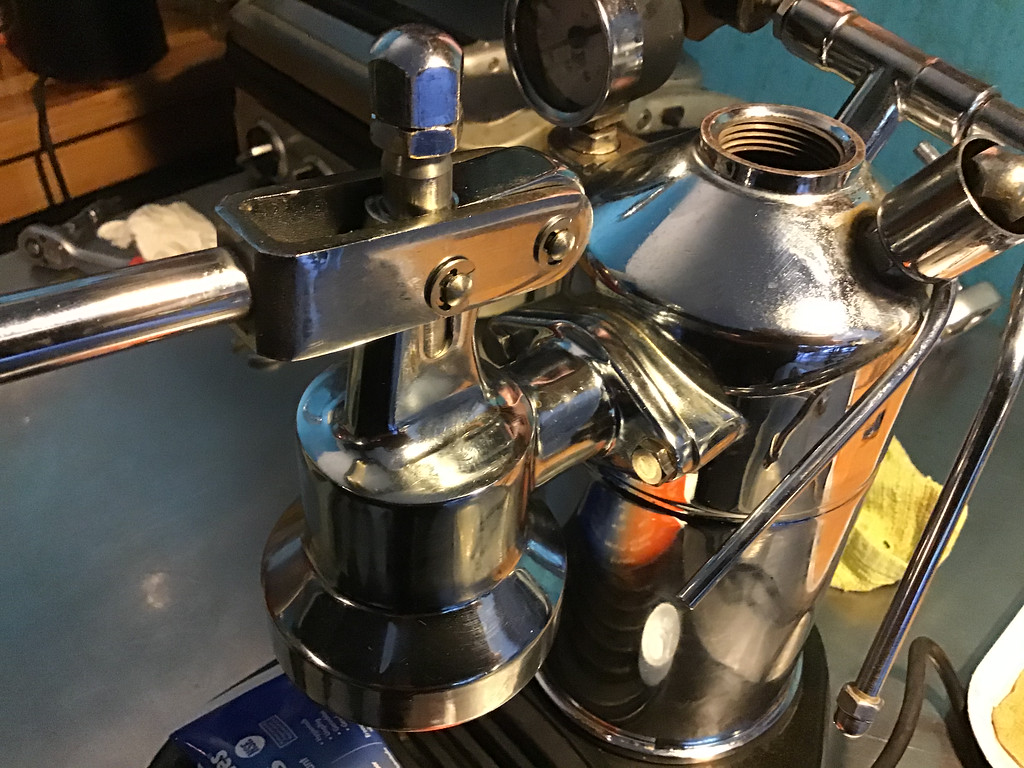
Now we grease the steam knob and install it, using a 14mm wrench.

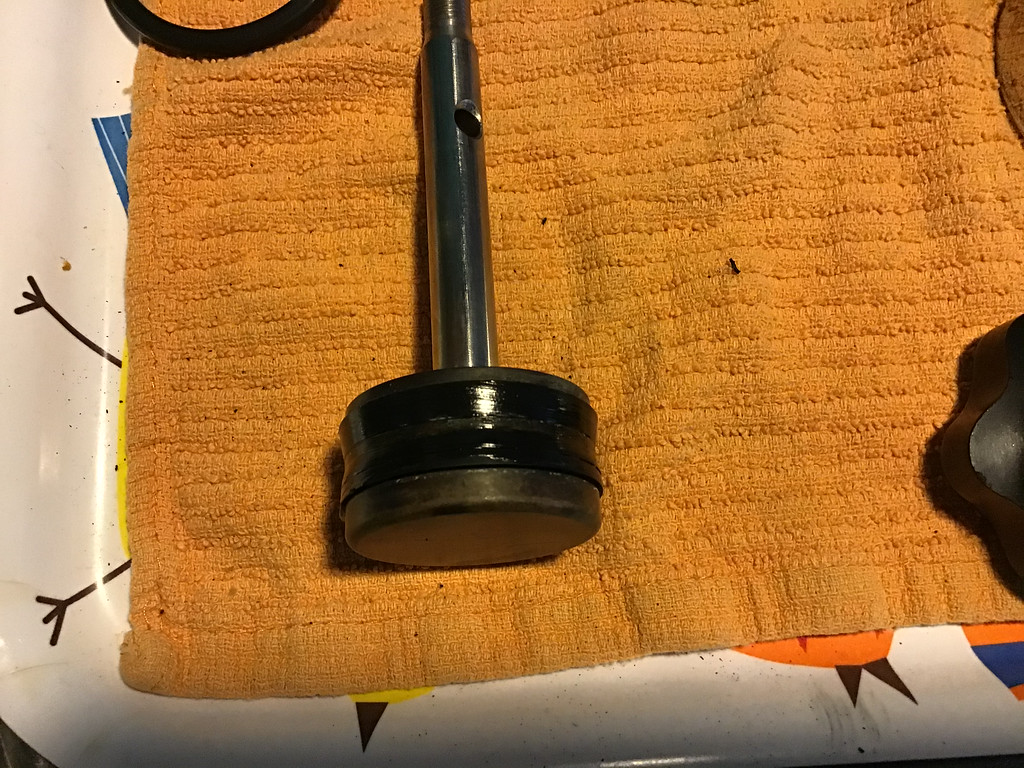
Grease the gaskets of the piston and push it into the group until the hole of the shaft is in the highest position.
Screw the copper water tube in and put the shower and O-ring in so your group is ready to be installed again.
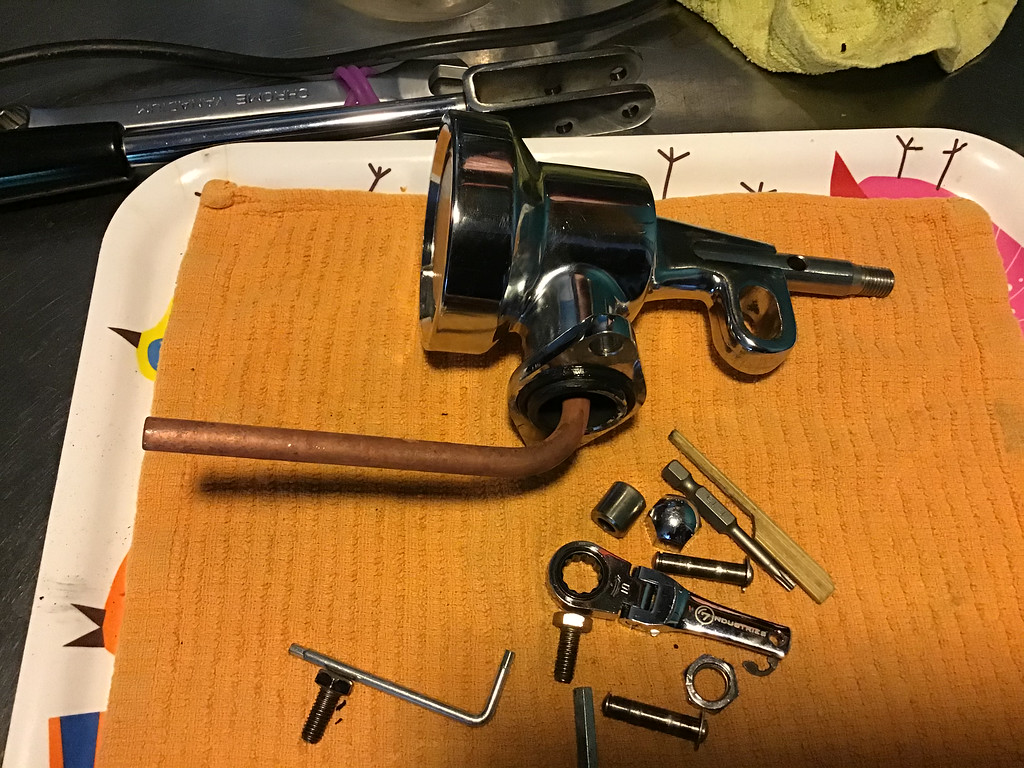
Install the lever in the correct position.
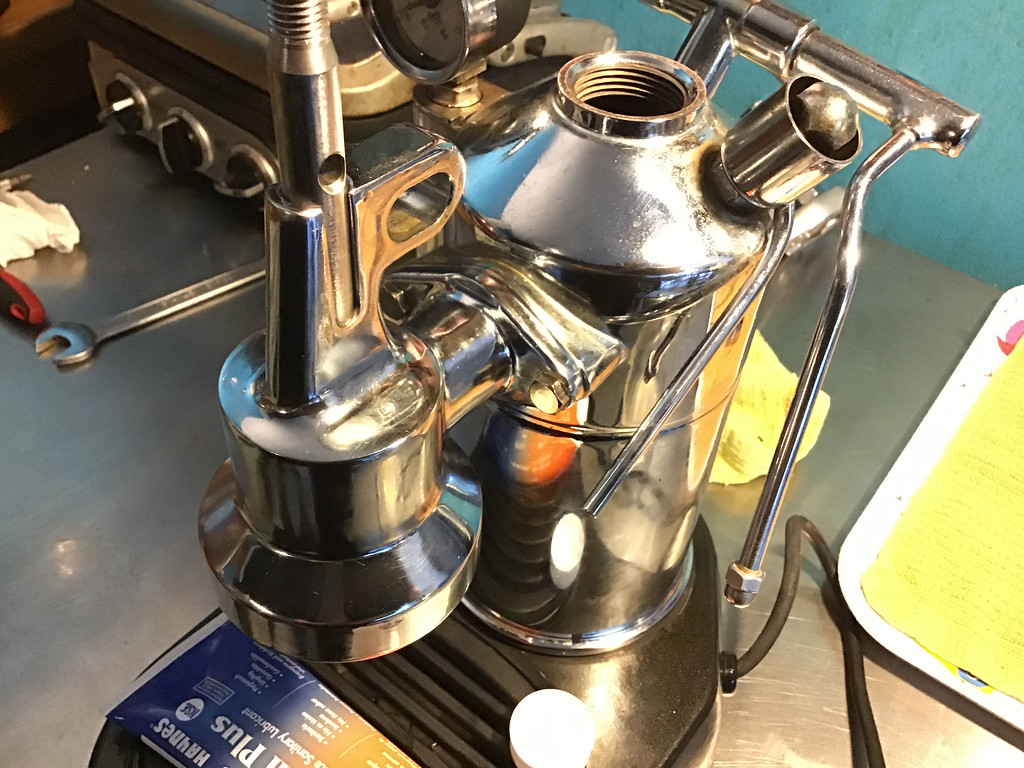
Fill the boiler.
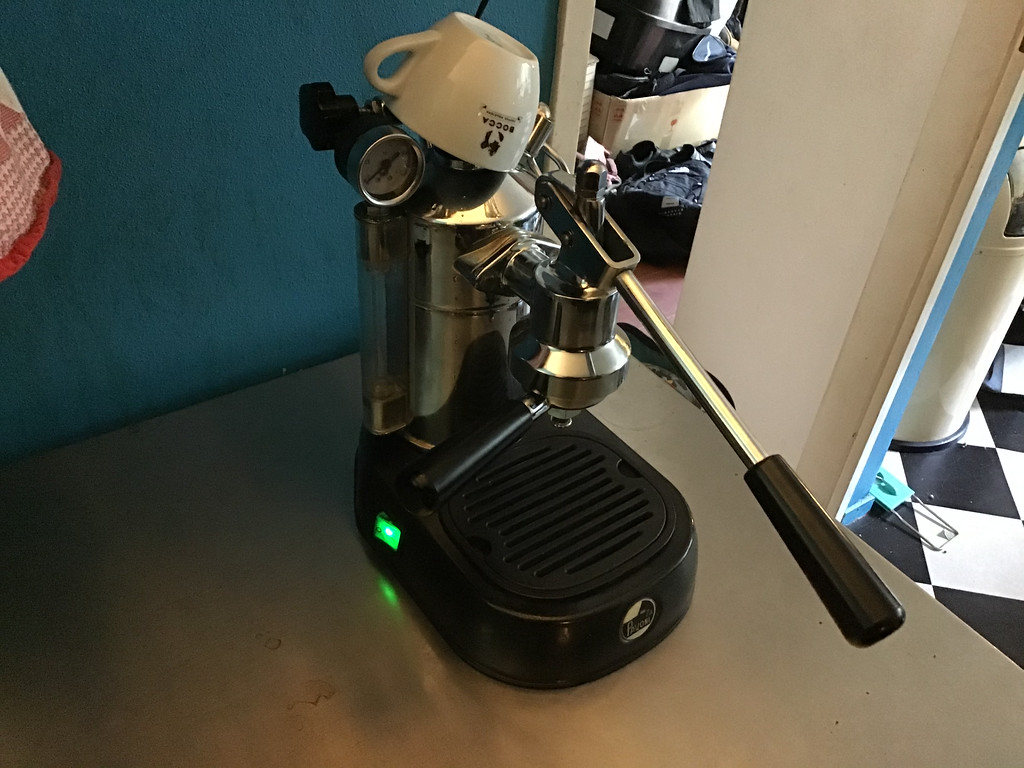
And the machine is ready to be plugged in.
Enjoy your clean machine!
If you have comments and/or if you want me to put a step by step manual on how to maintain the group, let me know in the comments.

Thanks for the writeup! With ever increasing water appearing inside the base with each use, my 1999 Europicola is tripping the GFCI, now. Using the hair dryer is not a permanent solution so I’m going to replace the gaskets. Your clear description has given me courage – wish me luck!
All the best,
Bob
LikeLiked by 1 person
Let me know if it worked out. I love to hear my write-ups are useful.
LikeLike
Gasket replacement success! The old ABS boiler nut was partially stripped so the job took an extra few days waiting for a new brass nut. I ended up making my own flange nut wrench out of a piece of 10 cm wide oak flooring and a couple of drill bits. Upgraded the steamer to a single hole nut and added a pressure gauge – stylin’, as the kids used to say 😉
LikeLiked by 1 person
Cool, that’s good to hear.
LikeLiked by 1 person
Thanks for the clear instructions. I have a 2001 build 8-cup machine that I bought new. I needed to replace the upper boiler gasket as the original one had broken into small pieces and the boiler could rotatate a little on the base. When the heating element was removed, I found the boiler flange could be unscrewed by hand. There was no trace of grease or other gunk on the boiler threads. I fitted the new upper gasket dry, as advised by the supplier. I tightened the boiler flange by tapping a wood drift held against the flange with a small hammer. I also replaced the o-ring when refitting the group head to the boiler, as the old one had flattened and was leaking. This o-ring was greased with a little vaseline, after cleaning the fitting groove carefully.
LikeLike
Good to hear, I love feedback on my articles. Keep your Pavoni brewing!
LikeLike
I’m going to have to do this soon and have been dreading it, but your step-by-step guide is the best I’ve seen and will definitely help.
LikeLike
This is brilliant. Thank you! Mine boiled dry 2 years ago and has leaked ever since. I have two questions: should I replace all the gaskets at the same time and where did you source the parts? I’m in France and I used to get them from the UK but then Brexit happened!
LikeLiked by 1 person
Glad to hear you found it useful, Scott. I suggest replacing only the heater element gasket first. You can replace it in five minutes by disconnecting the wiring as shown and unscrewing the three bolts that hold the heating element (this will also give you a good opportunity to descale the inside of the boiler and the heating element).
If that doesn’t stop the leaking, you can get into the arduous task of removing the whole boiler and cleaning and replacing all the gaskets.
LikeLike
That’s delightfully simple. Thank you!
Just to check: that’s the rubber seal (La Pavoni Lever Heating Element Seal Ø 3.53×73.98mm (Black Rubber) OEM Part No. 465225).
LikeLiked by 1 person
Pavoni uses different heating elements on various models. Best thing is to check the website. I order my gaskets and other parts from Van Pommeren (https://www.vanpommeren.nl), so I don’t know where you order the part wherever you are, but most websites can show which gasket goes with what heating element. If you check Pavoni parts on that website, you will see an exploded view with parts numbers.
LikeLike